Strawberry Shortcake Icebox Cake
Highlighted under: Heavenly Bakes
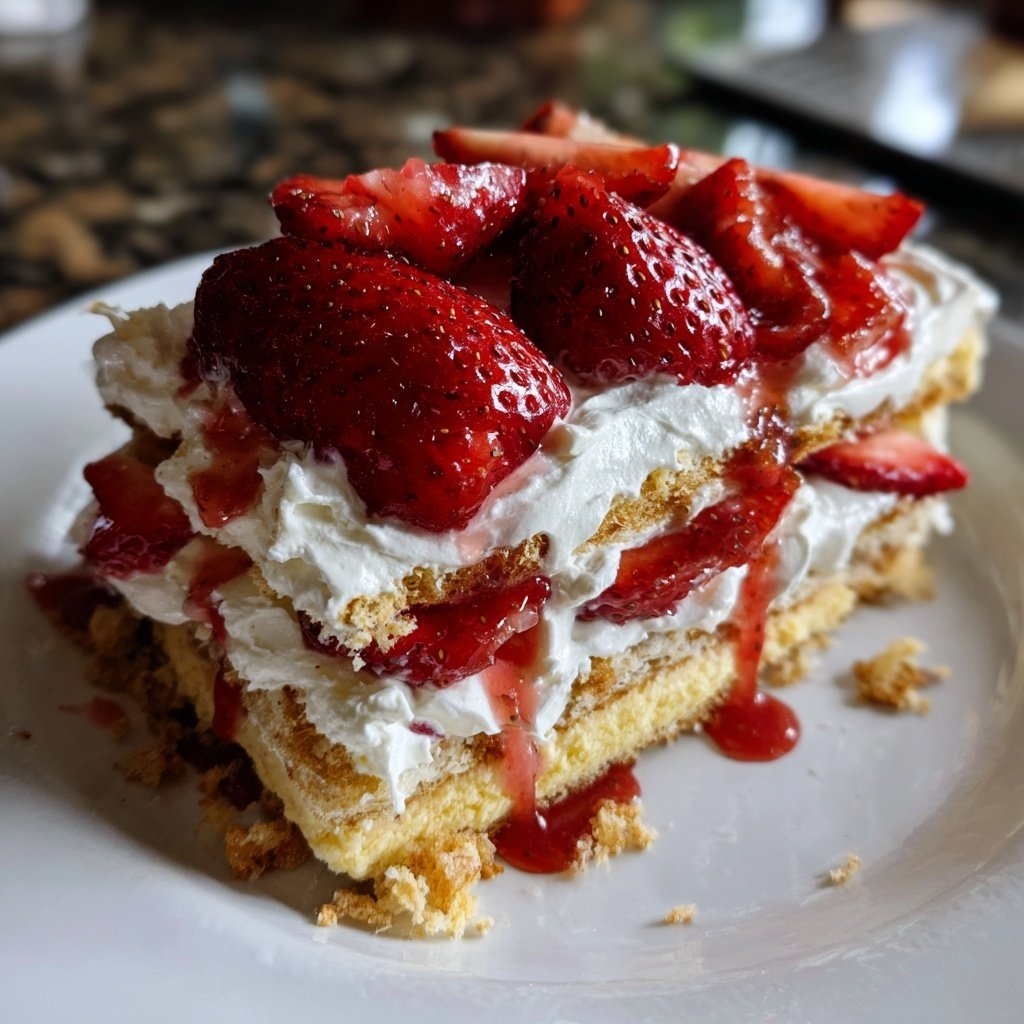
I absolutely love making Strawberry Shortcake Icebox Cake during the warm months. This no-bake dessert is a showstopper at gatherings, with layers of fluffy whipped cream, fresh strawberries, and soft cake that just melt in your mouth. The best part is that it takes minimal effort; you can simply assemble it a few hours before serving! Trust me, your friends and family will be begging for the recipe after just one bite.
When I first made Strawberry Shortcake Icebox Cake, I was amazed at how simple yet delicious it turned out. The combination of juicy strawberries with rich whipped cream creates a flavor profile that is simply irresistible. I typically use store-bought ladyfingers for convenience, but if you have the time, homemade cake layers will elevate it even more.
One tip I learned the hard way is to let the cake chill for at least four hours before serving. This allows the flavors to meld perfectly, and the cake becomes wonderfully soft. Plus, it’s a great make-ahead dessert that can save you time during busy gatherings!
Why You'll Love This Recipe
- Fresh strawberries burst with flavor in every bite
- Creamy whipped topping makes it super indulgent
- No baking required, making it perfect for hot days
The Importance of Whipping Cream
Whipping the cream correctly is crucial for achieving the light and airy texture that defines this Strawberry Shortcake Icebox Cake. Start with cold heavy cream; chilling your mixing bowl and beaters can also help. Whip the cream on medium speed until it starts to thicken, then add the vanilla extract and powdered sugar. Continue whipping until soft peaks form, which means the cream should hold its shape but not be too stiff. Over-whipping can lead to a grainy texture, so watch closely as you whip.
Using heavy cream instead of lighter options is essential in this recipe. The higher fat content not only contributes to a rich mouthfeel but also offers stability to the whipped cream layers, preventing them from collapsing under the weight of the strawberries and cake. This means you can slice the cake without it falling apart, creating beautiful, distinct layers that are as pleasing to the eye as they are to the palate.
Strawberry Selection and Preparation
When selecting strawberries, look for vibrant red berries that are firm and free of blemishes or soft spots. The flavor of your cake will largely depend on the quality of the strawberries, so don’t hesitate to taste them before purchasing. Once you have your strawberries, washing them gently and slicing them allows the natural juices to be released, enhancing the overall flavor and making them more versatile for layering into your cake.
After macerating the strawberries with sugar, give them a few gentle stirs to combine and ensure even distribution of sugar. This process draws out the fruit's juices, which will soak into the ladyfingers or sponge cake, adding moisture and flavor throughout the cake. If you prefer a less sweet cake, you can reduce the amount of sugar you add to the strawberries while still allowing them to sit for the same amount of time.
Assembling Your Icebox Cake
Layering is key when assembling your Icebox Cake. Start by laying the ladyfingers or sponge cake slices in a single layer at the bottom of your dish. If using ladyfingers, be quick: a light dip in milk (optional) can elevate their texture but soak them for just a moment to avoid sogginess. This creates a sturdy yet soft base that complements the whipped cream and strawberries beautifully. Spreading whipped cream immediately over this layer ensures that it adheres well and captures the juicy strawberry flavors.
Strive for even layers throughout the assembly process. This not only improves the aesthetic of your cake when sliced but also ensures each bite is a balanced mix of strawberries, cream, and cake. If you have a bit of extra time, consider letting the assembled cake chill for several hours beyond the minimum; this helps all the flavors meld together and enhances the overall taste. Just remember to cover it well with plastic wrap to prevent any absorption of odors from your refrigerator.
Ingredients
Gather these ingredients to prepare your Strawberry Shortcake Icebox Cake:
Ingredients
- 1 pound fresh strawberries, sliced
- 2 cups heavy cream
- 1/2 cup powdered sugar
- 1 teaspoon vanilla extract
- 24-30 ladyfingers or sponge cake slices
- 1/4 cup milk (optional, for moistening the cake)
Having the right ingredients makes all the difference!
Instructions
Follow these simple steps to create your Strawberry Shortcake Icebox Cake:
Prepare the Strawberries
In a medium bowl, combine the sliced strawberries with a tablespoon of powdered sugar. Let them sit for about 15 minutes to release their juices.
Make the Whipped Cream
In a large bowl, whip the heavy cream, vanilla extract, and remaining powdered sugar until soft peaks form. Be careful not to overwhip.
Assemble the Cake
In a rectangular dish, lay a layer of ladyfingers or sponge cake slices. If desired, lightly dip them in milk. Spread a layer of whipped cream over the cake, followed by a layer of strawberries. Repeat the layers until you run out of ingredients, finishing with whipped cream on top.
Chill
Cover the dish with plastic wrap and refrigerate for at least 4 hours, preferably overnight, to let the flavors meld.
Serve
Slice the cake and serve it chilled, garnished with remaining strawberries if desired.
Enjoy your delicious Strawberry Shortcake Icebox Cake!

Pro Tips
- For an extra flavor twist, try adding a splash of lemon juice to the whipped cream or using different berries along with the strawberries.
Storage Recommendations
To keep your Strawberry Shortcake Icebox Cake fresh after serving, cover it tightly with plastic wrap and store it in the refrigerator. It’s best enjoyed within 2-3 days for optimal taste and texture, as the whipped cream can start to lose its fluffiness and the cake layers may become overly moist. If you happen to have leftovers, try not to leave the cake out at room temperature for too long, as the cream can spoil.
If you want to make ahead, layer the cake without adding the final whipped cream topping. Assemble the cake a day in advance, then just before serving, whip fresh cream and spread it over the top alongside any leftover strawberries. This ensures your cake maintains its lovely presentation and avoids any sogginess.
Variations & Serving Suggestions
Consider experimenting with different fruits beyond strawberries, such as fresh blueberries, raspberries, or even peaches, to add variety. Each fruit offers unique flavor profiles that can subtly transform the cake while still keeping within the theme of a refreshing dessert perfect for warm days. Make sure to adjust the sugar levels based on the sweetness of your chosen fruits.
For an extra layer of flavor, you could incorporate a fruit puree or sauce between the layers for added moisture. A simple strawberry or berry sauce made by simmering down fresh fruit with a bit of sugar can elevate this dessert even further. I recommend serving the cake alongside a scoop of vanilla ice cream or a dollop of lemon curd for a delightful contrast to the sweetness.
Questions About Recipes
→ Can I use frozen strawberries?
Yes, you can use frozen strawberries, but the texture may be a bit different. Thaw and drain them before using.
→ How long does this cake last in the fridge?
The cake is best eaten within 3 days, but it can last up to 5 days refrigerated.
→ Can I make it dairy-free?
Absolutely! Use coconut cream and a dairy-free whipped topping for a delicious dairy-free version.
→ What can I substitute for ladyfingers?
You can use pound cake, angel food cake, or any sponge cake as a substitute.
Strawberry Shortcake Icebox Cake
Created by: Harriet Collins
Recipe Type: Heavenly Bakes
Skill Level: Easy
Final Quantity: 8 servings
What You'll Need
Ingredients
- 1 pound fresh strawberries, sliced
- 2 cups heavy cream
- 1/2 cup powdered sugar
- 1 teaspoon vanilla extract
- 24-30 ladyfingers or sponge cake slices
- 1/4 cup milk (optional, for moistening the cake)
How-To Steps
In a medium bowl, combine the sliced strawberries with a tablespoon of powdered sugar. Let them sit for about 15 minutes to release their juices.
In a large bowl, whip the heavy cream, vanilla extract, and remaining powdered sugar until soft peaks form. Be careful not to overwhip.
In a rectangular dish, lay a layer of ladyfingers or sponge cake slices. If desired, lightly dip them in milk. Spread a layer of whipped cream over the cake, followed by a layer of strawberries. Repeat the layers until you run out of ingredients, finishing with whipped cream on top.
Cover the dish with plastic wrap and refrigerate for at least 4 hours, preferably overnight, to let the flavors meld.
Slice the cake and serve it chilled, garnished with remaining strawberries if desired.
Extra Tips
- For an extra flavor twist, try adding a splash of lemon juice to the whipped cream or using different berries along with the strawberries.
Nutritional Breakdown (Per Serving)
- Calories: 320 kcal
- Total Fat: 26g
- Saturated Fat: 16g
- Cholesterol: 70mg
- Sodium: 45mg
- Total Carbohydrates: 23g
- Dietary Fiber: 1g
- Sugars: 13g
- Protein: 3g